Friday, May 29, 2015

ICS You Should Know : LM324 Quad Op Amp (chip with 4 operation amplifiers in 1 package)

lm324 pinout-note Vcc (current IN) and Vee (Ground)
The LM324 is a incredibly useful chip, perhaps more useful than any others except the venerable 555 timer, 386 amp, etc. 
That it's still being made today after more than 30 years of production is all the proof needed of its usefulness.
I'm NOT going to describe what uses an Op-Amp can be put to in and of itself, because I'll cover that in another IC weekly on something like the 386 or 741.
In this case the real importance and usefulness of the 324 comes from the fact that it has FOUR (4) Op-Amps in one package.

This also makes it easy to memorize the Pinout (which is the same in the SMD and the Through-Hole versions).  The 324 has 14 pins, 7 on each side.  This may sound complicated but all you really need to remember is the middle and outside pins.  For the middle, simply remember the Vcc (current IN, +) is the 4th pin and that Vee (Ground, - ) is the 11th pin.  For the outside, simply remember that EVERY CORNER is an OUT for the amps.  Everything else is an input.  This means all you have to really remember is 3 pins: Vcc, Ground, and Out (4 corners).  Simple.

Since the 324 has been in production as long as it has, its VERY very cheap. There are knock-offs, NOS (new old stock), vintage, overstock, copies made in China, Russia, Phillipines, etc as well as inexpensive new TI (Texas Instruments) ones.  You can find good ones for as little as 10 Cents a piece (.10 USD).  Can't beat that, can you?

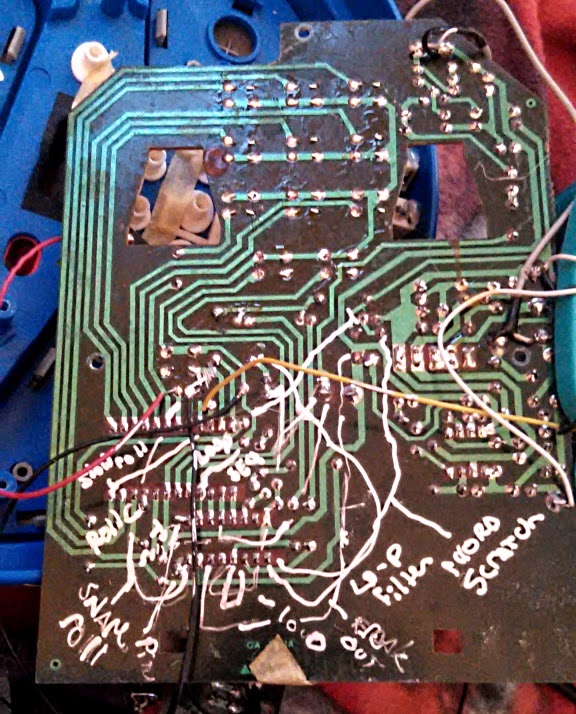
I use it most often for LED audio meters (LEDs light in response to loudness of sound) where some of the OpAmps are used as comparators, some to boost/amplify the signal; Lo-Pass Filter modules that I often add to guitar synth pedals, synths, and other audio circuits, and simple mixer circuits.

The thing to keep in mind is that ANYTHING that employs any opamp like the 386 or 741 can also be used with the 324 -and then combined with another circuit employing the remaining opamps in the 324 (since the 386 and 741 both have fewer opamps in their packages)

Below is an example of a filter schematic I've used employing the 324 which requires 4 opamps:
multiple mode filter with multiple outs and pots to sweep frequencies with


Thursday, May 28, 2015

How to Circuit Bend/Modify a Cheap Sampler :

modifying or bending an inexpensive "30 second greeting card sampler" adding Pitch, CV, Looping, Triggering, Input, and Output.

I noticed recently when searching for something else that a site had '30 second greeting card sampler'(s) for less than two (2) $USD!!
And IMMEDIATELY I started thinking: "There has to be a way to use that to make noise (aka music)".  So I 'offered' even less for a larger number.  I think I bought 4, although I'm not exactly sure because I ended up buying some more later once I messed up a couple of the original ones.   These Greeting Card Samplers or Greeting Card Voice or Message Recorders are available all the places you'd think they are like Amazon and Monopo-Bay as well as numerous marketing and advertising sites who sell them along with things you can put your business' name on to promote it.  They are priced in a fairly large continuum from 2 to 20$.   It's not hard to spend a couple of minutes and find them for even less than 2$ if youre looking for more than one.
Anyway, Here's what you get when you buy one of these:
30 second voice / message greeting card reorder

It's a small PCB with 2 tactile buttons (not shown in pic above) for 'play' and 'record', a generic miniature electret mic, cheap 8 ohm speaker, and 3mm red LED.  Unfortunately, the IC is covered with the good ole total bullshit black gumdrop so your guess is as good as mine on that.  Also included are 2 1.5v el44 hearing aid batteries.

Bending/Modifying

The first thing to take into account here is that ALL the wires are TOTAL shite  - I mean we're talking so bad that the first two ones I was messing with I wrote off because I thought they were DOA when it was just shorted wires on both.  When I was going through the board looking for the bend points I wanted, it was pretty normal for me to have to stop and 'jiggle' the wires until I found whatever one was shorting out that time and got it to function again.  So,
-Step 1 is to remove all the wires after noting what is what and where it went (from here out, order is arbitrary so you can do things in whatever order you prefer)

-Step  2 replace the batteries (if youre going to do this at all)
I've had a LOT of different values on these, its pretty much the only thing that varies among the boards sold as 'greeting card message recorders'-some are 6v brought to 5v by a voltage regulator and some are 3v etc.  In this case, this board runs on 3v (1.5v x2).  Note : you cannot always just add the battery voltage together. Most times yes, but sometimes the batteries are run in different ways.  


For example, If you just connect the pos to pos and neg to neg then the voltage stays the same. Its only added together when they are connected in pos-neg series-or when opposite polarities are connected to that current flows from one to the other.

click for larger version
Step 3 Add SPDT/transistor to loop the sample : Since these type of 'message recorders' are built to be triggered by a button press and need to be re-pressed (you can't simply hold down the button) -you can't just connect a toggle switch to the tactile momentary switch wires so that the connection is constant.  That would just result in a single play of the sample and youd have to switch the switch down and then up again to play it again.  The solution? Use a transistor to re-trigger over and over.
How do you do this you ask? Well, in this case I used a NPN transistor (meaning it has a Base middle leg, collector and emittor outer legs), which basically connects the two outer legs whenever current  (in this case I used a 2n2222 but any other NPN will work..probably) changes on the middle leg.
Since I needed to switch this on and off I stuck a SPDT toggle in between the middle leg and the source of trigger (the inner LED pad).  Since there was another lug on the toggle to use, I simply connected it to the tip of a audio jack so that incoming current (like CV) can be used to trigger the loop as well -as an added plus.


Step 4 adding an out (or keep the speaker, or add a switch and have both!) As noted in the photo above, simply solder two wires where the current speaker wires are.  However, its important to add a small resistance resistor (4.7ohm to 22ohm) in between the two connections on the out jack to cut down on the gain some-otherwise its going to sound like youre intentionally blowing the speaker all the time when you plug it into something.  NOTE: the polarity of the connections in the photo is just a guess, I can't remember which is pos and which is ground.  Just try for yourself-youve got a 50/50 chance so it should be easy to figure out!

Step 5 adding a Pitch Mod to alter the pitch of the sample/loop play
I used a 500k potentiometer, but almost any will work.  Try whatever sounds good to you and see what you like. You may also want to leave in the original resistor you connect the two leads (from the wiper and outside lug-whchever it doesnt matter which really-of your potentiometer) on either side of.  Anyway-see above photo for exact location of the clock resistor.  What youre doing here is a standard circuit bending trick-hijacking the clock for the circuit.  Its what tells the circuit how fast to play the sample.  In this case its a resistor but it could be a crystal or all sorts of stuff -its just a resistor in cheap stuff cuz thats the cheapest option.
So, by changing the value of the clock resistor, were changing how fast the circuit is being played, and thus, its pitch.

Step 6 adding an IN : simply connect the red (pos) line to the electret mic to the tip of a jack and the black (ground) to the sleeve lug and you're good to go! you can also either add a switch and keep the mic or keep both wired in if you want.

Here's my finished bend (first time I did it anways so kinda messy):


Saturday, May 23, 2015

NEW Hand-made Guitar Synth-Fuzz, Bit-reduction Pedal w/Optical Compressor "Atomic Fyreball"

Atomic Fyreball 


Sparkly Blue-Green!
This one was a custom order for a local musician. He uses Fuzz a LOT in his band live and Crazy-Destructo Noise a good bit in solos and intros.  He wanted a pedal that would give him those options but NOT blend into the general 'wall-o-noise' the rest of his band puts out.  With a Bass player using distortion/fuzz on his bass, another guitar player doing same, key player putting out noise in the same end of the audio spectrum, and REALLY loud drummer..well, it meant I couldn't just mod a typical fuzz pedal or make a few changes to a guitar synth schematic.  I'd have had to change them so significantly that they wouldnt actually BE those things anymore.

What was the answer?

I dunno.  But I decided MY answer would be to add an extra and totally external compressor to the effect pedal.  That way he could turn it on and turn it off depending on whether the rest of the band was playing live or if he was in the studio or playing alone.

In general, I strongly believe in providing as many options as possible with the audio devices I design and create. I think they will be more useful in more situations and to more people if that is done.  Often times, its simply adding a potentiometer (knob) and a couple of wires or a switch and some wires. It hardly ever means really doing to too much trouble...so why not?
looking down on destruction!

Anyway, in keeping with that ethos, I added the extra compression circuit-a simple optical compressor. I used as many vintage components as possible-things like vintage transistors and semiconductors and germanium diodes-and stuck the whole thing on old-school through-hole perfboard. There are two knobs to control Gain and Compression-which are all that a guitar player should really be interested in -in this case, anyway.  Since it was totally separate, I didn't feel like it was a good idea to just slap in a SPDT toggle, and instead threw in a whole other footswitch/led/in/out & true bypass-so that he could just use the compressor if he wanted to.  Certainly at least he could toggle it off with his foot and the Fuzz would come through the true bypass.

For Fuzz/Synth/General Destruction I used a version of Tim Escobedo's original Uglyface via a modified MusicPCB.com's Uglyface PCB.  He wasn't doing a lot of complicated or noticeable GuitarSynth stuff so he didn't need the additional options adding a LFO/Modulation would have offered-so I stuck with modifying the Uglyface towards Fuzz and Dstruction and away from GuitarSynth duty (it can do all 3-to varying extents, depending on the modification and resistance returned into the circuit from the control generally via potentiometer).

The result is this beauty. Im going to try and get him to let me video him using it for the video demo. Im also going to make about 10 others as there is some interest. Since only 5 of them are spoken-for already, Im going to put the other five on the http://www.newvoodoosound.com site.
If they prove really popular and sell fast, I'll make some more.
Please, if you check them out and think they're too expensive or you'd prefer some slightly different version-let me know. 
If I agree or a lot of other people agree--then I'll make & sell it that way.

WEEKLY-ICS you NEED to KNOW: Princeton PT2399:

Datasheet can be downloaded here: http://sound.westhost.com/pt2399.pdf

pt2399 pinout
This chip is used (and this is only from the top of my head) in : DOD delay pedal; Danelectro FabDelay; numerous other delay pedals, Synthrotek's Dev Delay, EKO module, EKO mkII, Cosmic Delay; GetLofi's Lo-Fi delay, Mad Bean pedal's Sparklehorse and other digital delays, the DIY-site ubiquitous Rebote Delay pedal, and on and on.

In other words-if you have a couple of hardware delays in your studio/music area, then you probably own a PT2399 at work.

There are a number of reasons for this:
-its a REALLY good self-contained, one-chip answer to audio delay.
-it doesnt require external memory like the MN-type analog BBD delays
-it doesnt require the 'dialing in' that other delays do, meaning you have to mess with a trimmer after
  building a circuit using it
-PT2399's can be CASCADED to increase delay time (time between returns)
-it allows you to add everything from Reverb to Chorus to a device with very little effort
-a fully-functional audio delay circuit can be made with it employing just a handful of passive components
-etc

Important DIY info:
There ARE onboard Op-Amps (meaning it can also do all the things opamps can do-simple synths, negative feedback amplification, etc) BUT about the heaviest load they can drive is roughly 1kohm (in my experience-I honestly dunno what the datasheet says if it says anything).

Always ALWAYS make sure the grounds are grounded: in particular, I am referring to Pin 4 (digital ground)--do NOT ignore it and assume since you have Pin 3 (Analog ground) grounded, you are OK. For a number of reasons, this is not so.  Most time, the easiest way to deal with this is to connect Pin 4 to Pin 3

Noise is something you are going to HAVE to deal with there just isn't a way to avoid some minimal noise with the chip..but normally that doesnt matter-especially when dealing with something like a guitar pedal where you can just chop the  output frequency at human-audible levels if necessary.  The normal way I deal with this is just to use a 7805-type regulator on the power and a 2.2uf (or less, whatever works for your purposes) decoupling capacitor.  After that, noise should be reduced to a easily handled level.  Just remember, if you design a device/circuit with the PT2399, do NOT leave out some means of dealing with noise simply on the assumption its digital and wont produce much

Modulation can be EASILY added -there are a LOT of different circuits and means of doing this, I dont want to say too much about it-just know it can be easily done and use your favorite search engine to figure out the way that works best for what you have in mind.

Its pretty easy on power -you wont have to worry too much about overall drain when you add a delay to your circuit via the PT2399-likely you will not need to alter your power in the circuit at all. For example, if you are using a 9v DC batter with a simple 78xx regulator and so forth for whatever you are already doing, you will not have to worry about drain if you add a PT2399 (thus adding delay) to the circuit.(in MOST cases)


Tuesday, May 12, 2015

--WEEKLY :  IC'S YOU NEED TO KNOW---


You'll see this chip a LOT in CV sequencers and bent devices.
Here's why:
It makes things like other IC's and Microcontrollers (Arduino, Rasberry Pi) able to perform the same tasks that analog physical switches can.
For example, you want your Arduino to switch on a light switch.  How can you do it? All the arduino can do is send out 0's and 1's (digital) or PWM/square wave/analog electrical signal/audio/etc..it cannot switch things.
2 options: if its just a simple thing like one light switch you might use a 2n3904 or other simple pnp/npn transistor..or you can use a 4066-and switch on/off multiple things.  In this example, you'd take the 2 leads that are attached to the light switch and connect them to either pin 1&2, 3&4, 10&11, or 8&9--those are the ends of the circuit you want to join or separate.  Then you'd connect either pin 13, 12, 5, or 6 to the Arduino/Raspberry PI/PIC which can then connect or separate the circuit by opening and closing the connection according to whether its sending an UP or DOWN signal to the (13, etc) pin on the 4066.

This, obviously, becomes incredibly useful for sequencers and circuit bends or instrument mods.

Hopefully this simple explanation of the CD4066 can help you understand the chip and gives you some ideas how to employ it fucking up things.

Link to PDF datasheet: HERE IS THE DATASHEET FROM TEXAS INSTRUMENTS FOR THE CD4066
HERE IS THE DATASHEET FOR THE HOLTEK CHIPS MENTIONED IN THE POSTS BELOW

Monday, May 11, 2015

Well, it DID work.  Just FYI, in case anyone is wondering-Ive included a rough sketch I used to design the circuit:
awesome artistry, I know.
FYI-I used a 9v battery for the whole thing (outside of the power driving the drum synth).
I'll post a finished video when Im done with the piece, but in the meantime-here's a crappy demo of the semi-working sequencer breadboarded and running the synth via a piece of solder employed as a wire. (so professional, i know).:
https://youtu.be/x4Sf8JT98xE is link, or:
Casio "Cool Drum Synthesizer" circuit bend/mod

First of all, I really dig the fact that one of the "features" is "Big Speaker". (pictured in second photo).  Second of all, believe it or not, there was NO INFORMATION ON THE WEB ABOUT THIS SYNTH/TOY/PRODUCT...none..ZERO..zip.  Crazy, right?  You just don't expect that anymore.  Honestly, im sure there IS something, somewhere, but its not reachable via any combination of search/meta search terms or phrases I can think of--so its at best difficult to find.
So, I'll give you all the information I can think of that's relevant and useful.  I'll post a pic of the PCB and the bends I found (see pic #3), and I'll attach the datasheets of the relevant IC's (also hard to find).  Just as an aside, the chips-although unnecessarily complicated-are pretty fucking awesome.  I dunno where else or who else made a series of chips with actual drum SYNTHESIZERS on them that were cheap and simple. Im pretty sure Holtek, the maker of the ones here-the hp3090 and the hp82142 *(so necessarily coupled that their datasheet includes each other), is the only maker who did.  They made a LOT of bad ass chips that are killer and absolutely PERFECT for the DIY community.  Among them are the ht8955 voice echo, the ht8950 voice modulator, ht8970 delay, etc.  I dunno why they were such a kick-ass company in the 80s to the late 90s/early 2000s and stopped being one now..probably financial reasons.
Anyway, enough digressing, check out the "Big Speaker" (technical term)
"big speaker-about 3.5" in diameter, 8ohm"
I was really impressed when I opened this thing up because, thankfully, there were no black gumdrop processors and no SMD.  It was like a breeze of sweet fresh air blew into the voodoo lab from an oregon forest.  You just never see stuff like this anymore. Things just MADE to be fucked with.  (with the notable exception of Korg's consumer products like the Volca and Monotron series-they have SMD's etc BUT also have all useful bend points, like "pitch" and "snare" identified with written notes on the PCBS..very cool). Anyways, heres the back of the PCB.  Click on the pic for the larger version. Ive done my best to make it clear where stuff is and take a clear photo. Im sure its not perfect but im not putting hours into it or anything.

If anyone else finds this product or another one using the HT3090/82142 combo, keep this in mind: bends involving the 3090 will affect only the sequence..the play of the sounds. For example, I found some that were stutters which basically made the drum being played do a drum roll. Imagine a snare shot being repeated quickly in succession.  Other ones were repeats sounding like echos or tempo changes-slowing or quickening.  A few stopped or paused the play of the sequences or beats.  I didn't note most of these as they were either not all that useful to justify using a switch up or did not return to the beat after being triggered so weren't useful for that reason.
Bends from the 82142, particularly the oscillator in/out were the most effective on the sound of the drums.  I wont bother going into them -i dont want to take the fun of discovery out of bending this killer pair of chips--but start there if you are looking for really fuck with the drum sounds.
As far as the pitch goes (note in the pic of the top of the PCB-the clock setting resistor is right on top of the 82142), note that it is a GLOBAL pitch change that is affected by altering the resistance however you do it (potentiometer, LDS, photo, softpot, etc)-so the WHOLE sequence will be pitched up or down (making it play faster or slower)-so its really most effective if you manually trigger a change and quickly return the pitch to normal so that only one drum hit is affected.  Anyway, here is here it is located:
Clock resistor, I believe its 120k


Note: the pitch/clock resistor appears to be a 120k one, but since the 4 band code for 120k 1/4 watt involves a yellow band and the resistor is old and sorta worn-I cant be sure. It might be a white band or something else.

Here's my plan--Im going to run all the bends to individual SPDT switches, and run a potentiometer like 250k from the clock resistor spot to allow me to dip below and above the set value, essentially slowing and speeding up or pitching down and up.  THEN im going to run a 4017 to a 4066 and run a single track sequencer which will have a rotary switch allowing me to send the 4017 trigger pulse (in this case-according to the 3090 datasheet, a low instead of high trigger) to one of the 4 4066 switches and trigger one of the 4 drum synths.  Since there is no cymbal/high hat etc I dont see the reason to have any other tracks and Im pretty sure the 3090 wouldnt be able to trigger all 4 drums at once anyway.  So one track will be sufficiently useful to be worth doing.

Just FYI the reason I need the 4066 is because its basically a series of switches (4, i think) which can be triggered via electronic means-opening and closing the circuits like the pushbutton switches on the synth itself do-to make the drums play.  The 4017 is basically a sequence playing chip which runs 10 steps over and over, and has a few other functions like a reset and stop/pause.  Helpfully, each step has a up and down.  Im not sure if this plan will work. Ill post later regarding the success of it.
I'll also post a video with audio of the finished synth.  If ANYONE has one of these or sees one, I'll buy it, no matter the condition, unless its missing the chips. Ive tried everywhere to find them but cant. Ive put out some feelers on alibaba and some other supply houses which might have surplus left over from whenever sitting around.  of course, that sorta request basically leaves you open to fraud and getting a bunch of "HT3090" chips which have "holtek" printed on with magic marker or whatever.
Anyways, here 's some more photos of the crazy cool 80s box etc:

At the end of the second world war, particularly the fall of Berlin/end of the European
fighting-hundreds of thousands of Jews who survived the holocaust were fortunate
enough to escape either the Nazis or the Soviets..or both.
Many of the orphaned children of these ended up in 'displaced persons' camps in the around the U.K.  For years,
it was a normal thing to hear hundreds of names during BBC radio broadcasts.
The really interesting, and inspiring thing, was not just that the broadcasters
took the time and effort to mention the individuals (which is pretty unusual even then)
The truly inspiring thing is that these individual holocaust survivors would be
given a form (or asked from a form) to fill out with any relative or friend of the family
who might be contacted anywhere in the world essentially.
This isnt as ridiculous as it might seem at first. If you and your family are about
to flee a war or oppressive/dangerous conditions and are part of a people who
have a LARGE history of fleeing violence, prejudice, injustice, death, and destruction,
you have some cultural memory and/or experience to draw upon.  You are aware that your family
may, possibly will, be separated, and additionally, that the difference between
life and death may easily be a name.  So you have every member of your family old enough to
speak memorize the names of relatives and friends who might provide shelter from
whatever danger you are fleeing.
So when these jews in the displaced persons camps were told to list anyone who
might be able to help them, get them settled, give them work, or a home--they had
some names to give.  At least, a large number did. So, on any given evening in
1946 a person in London might turn on the radio to hear "Leela Silvenberg, age 9,formerly of Dresden,
Germany, escaped the camp in Aushwitz, and has lost her entire family.  If Robert Silver of
London's East End or Hanah Ableton of Brighton or someone who knows either of those
persons hears this broadcast please contact..."
Surprisingly, over 80% of the persons whose names were broadcast were located and
a large percentage (although not all-as some were such awful human beings as to tell
some of the refugees to 'stand on [their] own two feet', etc) DID take in the refugees
or help them to find family members in other countries.  Some of the refugees were
even sent to places like the US as a result of persons here hearing a name they
recognized as a child of a relative or friend and volunteering to take them in.

I was able to hear a few of the BBC broadcasts asking for assistance on behalf
of these children recently and it was incredibly moving.
Why aren't we doind this for refugees from North Africa that are in camps in Italy
or those who are running from fighting in Syria or Lebanon?
Surely there are friends and relatives of some of these people in the US or Europe?
Others could even volunteer. I would volunteer to give a pair of refugee children a
home for a few months until they could be found a more permanent solution.  Im sure
there are others who would do the same.
I HAVE to believe that the majority of humanity hasn't changed all that much since
1946.  Most people would still help a suffering and alone child if they had the
capability. 
I just wanted to expunge the thought from my mind by writing it down.  Its SOOOO incredibly
frustrating that things like money and advertisers would keep broadcasters from doing
a similar thing for refugees now. I mean, really, are we comfortable with a culture
that puts the sale of toothpaste or the lauding of its taste, etc above the alleviation
of a child's suffering?
And, if we are, is there a reason we should even bother continuing on if our cultural
is that bereft of humanity and true value?

just a thought.